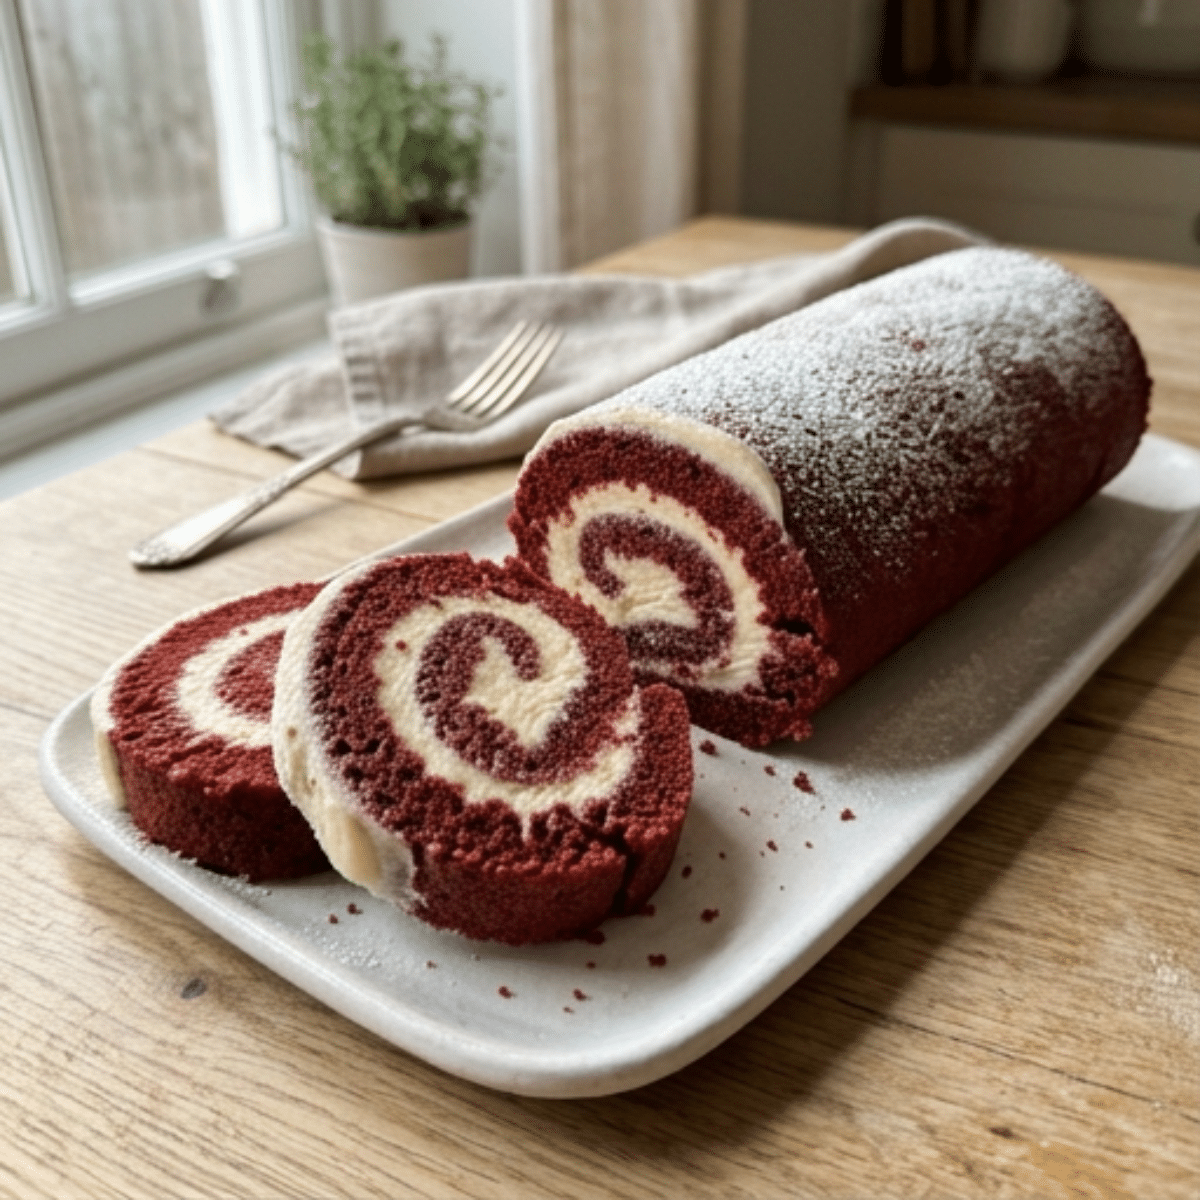
Red Velvet Cake Roll Recipe might look like something you’d order from a bakery, but trust me, it’s easier than you think. Have you ever wondered how to get that beautiful swirl without breaking the cake? I used to worry about that part, too.
After making this dessert for special occasions, I’ve learned that timing makes all the difference. The trick? Roll the cake while it’s still warm, using parchment paper to help it hold its shape.
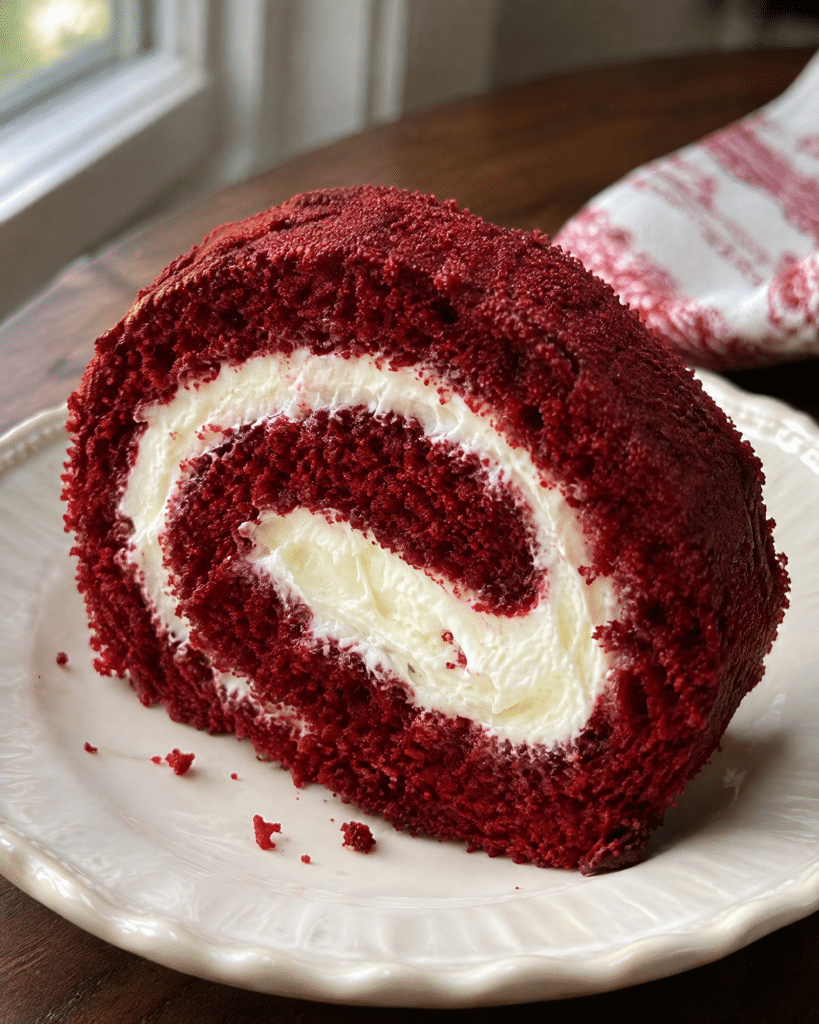
And can we talk about the filling? That creamy, slightly tangy cream cheese tucked inside a soft, moist red velvet sponge is what makes every slice so satisfying. There’s just enough cocoa to give it that classic flavor without overpowering the sweetness.
Whether it’s Christmas or a family gathering, I’ll share the little details that help this red velvet cake roll turn out beautifully, even if you’ve never made one before.
Table of Contents
Red Velvet Cake Roll Ingredients
You know what’s funny about making a Red Velvet Cake Roll Recipe? The ingredient list looks pretty ordinary, but those little measurements really matter. Too much flour, and your cake might crack when you roll it. Not enough moisture, and that lovely sponge can turn dry.
Don’t worry, though. You won’t need anything fancy or difficult to find. Most of these ingredients are probably sitting in your kitchen already. The trick is understanding what each one does, especially when you’re trying to make a cake that’s soft enough to bend without falling apart.
Before we get started, here’s a little advice: measure everything first. Trust me, it’s much nicer to have your ingredients ready than to realize you’re missing something halfway through mixing!
Ingredients for a Moist Red Velvet Cake Roll
Here’s what you’ll need for that beautiful red sponge:
- ¾ cup (90 g) all-purpose flour: Gives the cake structure without making it too heavy.
- ¼ cup (20 g) unsweetened cocoa powder: Adds that gentle chocolate flavor we all love in red velvet desserts.
- 1 teaspoon baking powder: Helps the sponge rise and stay light.
- ½ teaspoon salt: A small amount that makes the other flavors shine.
- 4 large eggs: These are especially important! Whipping them properly creates the airy texture that helps the cake roll.
- ¾ cup (150 g) granulated sugar: Adds sweetness while helping the cake stay tender.
- 1 tablespoon vegetable oil: Keeps the sponge wonderfully soft.
- 2 tablespoons buttermilk: Brings moisture and a subtle tanginess.
- 1 teaspoon white distilled vinegar: Adds acidity to the batter.
- 1 teaspoon vanilla extract: Gives the cake a warm, familiar flavor.
- 2 tablespoons red food coloring: Creates that gorgeous red color, although you can leave it out if you prefer.
Now, here’s something I really want you to remember. Once you add the flour mixture, don’t keep mixing just because the batter looks beautiful swirling around the bowl. It’s tempting, I know! But overmixing can make the sponge tougher and knock out some of the air you’ve worked so hard to create.
And what about the cocoa? You might think more chocolate would make the cake better. Actually, red velvet has its own personality. A little cocoa is enough to give it that delicate chocolate taste without turning it into a regular chocolate cake roll.
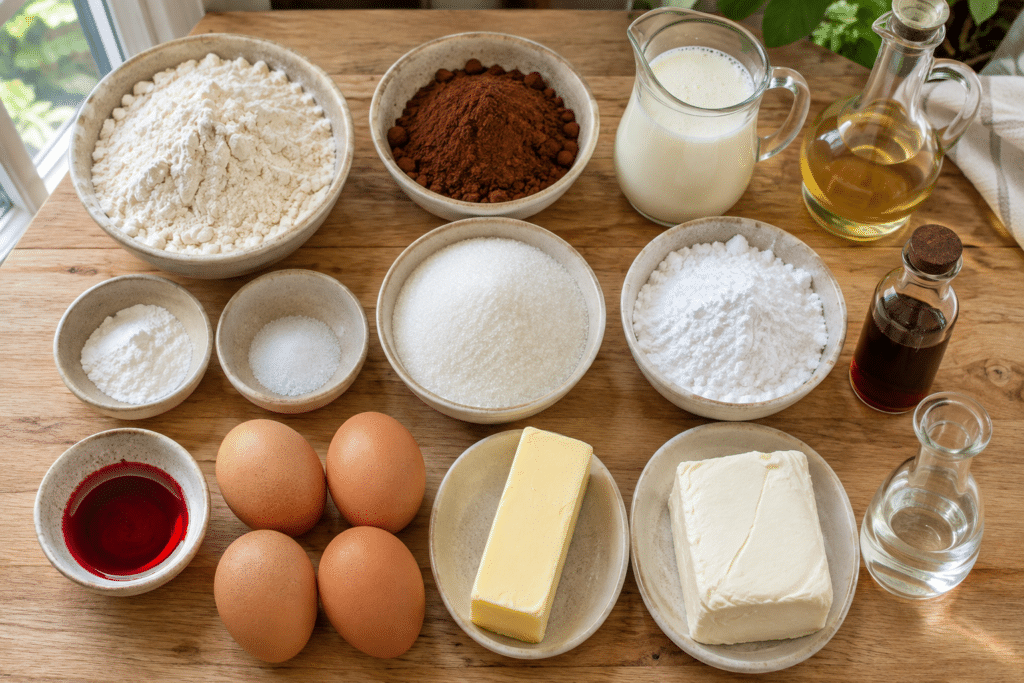
Ingredients for the Cream Cheese Filling
Can we agree that the cream cheese filling is half the reason we’re making this dessert?
That creamy white swirl against the bright red cake is gorgeous, but the flavor is what really makes it special. You’ll need:
- 8 oz (226 g) cream cheese, cold: Adds that delicious tangy flavor and helps the filling hold its shape.
- ½ cup (113 g) butter, softened: Makes everything smooth and creamy.
- 1 cup (120 g) powdered sugar: Adds just enough sweetness without overpowering the cream cheese.
- 1 teaspoon vanilla extract: Brings the flavors together.
Here’s a question you might have: “Shouldn’t the cream cheese be at room temperature?”
Not for this particular filling! The recipe uses cold cream cheese and softened butter. The combination helps create a frosting that spreads nicely without becoming too loose.
Once you’ve mixed everything, pop the filling into the refrigerator while the cake cools. You want it creamy enough to spread but firm enough to stay inside your red velvet cake roll with cream cheese filling.
Because nobody wants all that delicious frosting escaping out the sides when it’s time to roll!
Equipment Needed for a Red Velvet Jelly Roll Cake
You don’t need professional baking equipment, but there’s one thing I wouldn’t skip: a 15 x 10-inch jelly roll pan.
You’ll also want:
- Parchment paper for lining the pan and rolling the cake.
- An electric mixer for whipping the eggs.
- Mixing bowls and a flour sifter.
- A wire cooling rack.
- An offset spatula for spreading the filling.
- A serrated knife for clean, beautiful slices.
Here’s my favorite part about this method: there’s no need to roll your cake in a powdered-sugar-covered kitchen towel. Parchment paper does the job, and you won’t have to worry about staining your towels red.
Can I Make a Red Velvet Cake Roll Without Buttermilk?
Absolutely! If you open the refrigerator and realize you’re out of buttermilk, there’s no need to abandon your baking plans.
Simply mix 2 tablespoons of regular milk with ½ teaspoon of vinegar and let it stand for about 5 minutes before using it.
And yes, you’ll still add the separate teaspoon of vinegar listed in the recipe.
One last thing before we start baking: make sure your pan is ready and your ingredients are measured. Once that sponge comes out of the oven, timing becomes important, and you’ll be glad you prepared everything ahead of time.
How to Make a Red Velvet Cake Roll: Step-by-Step Instructions
Ready to turn those simple ingredients into something beautiful? This is where your Red Velvet Cake Roll Recipe really comes together. Don’t let the rolling part intimidate you. I’ll walk you through each step, including the little details that can make the difference between a cracked sponge and a lovely, smooth swirl.
Step 1: Prepare Your Pan and Dry Ingredients
First, preheat your oven to 350°F (175°C). Line a 15 x 10-inch jelly roll pan with parchment paper, leaving an inch or two hanging over the edges. That extra paper will make lifting the cake much easier.
In a separate bowl, sift together the flour, cocoa powder, baking powder, and salt.
And please don’t skip the sifting! Nobody wants to bite into a little lump of cocoa powder.
Step 2: Mix and Bake the Red Velvet Cake Batter
Now grab your electric mixer. Beat the eggs on medium speed for about 5 minutes, until they’re pale, light, and frothy.
Slowly add the sugar and vegetable oil while mixing on medium-low speed. Next, pour in the buttermilk, vinegar, vanilla extract, and red food coloring.
Beautiful color already, isn’t it?
Add the dry ingredients and mix just until everything comes together. Spread the batter evenly in your prepared pan.
Bake for 13 to 15 minutes, or until the cake springs back when gently touched.
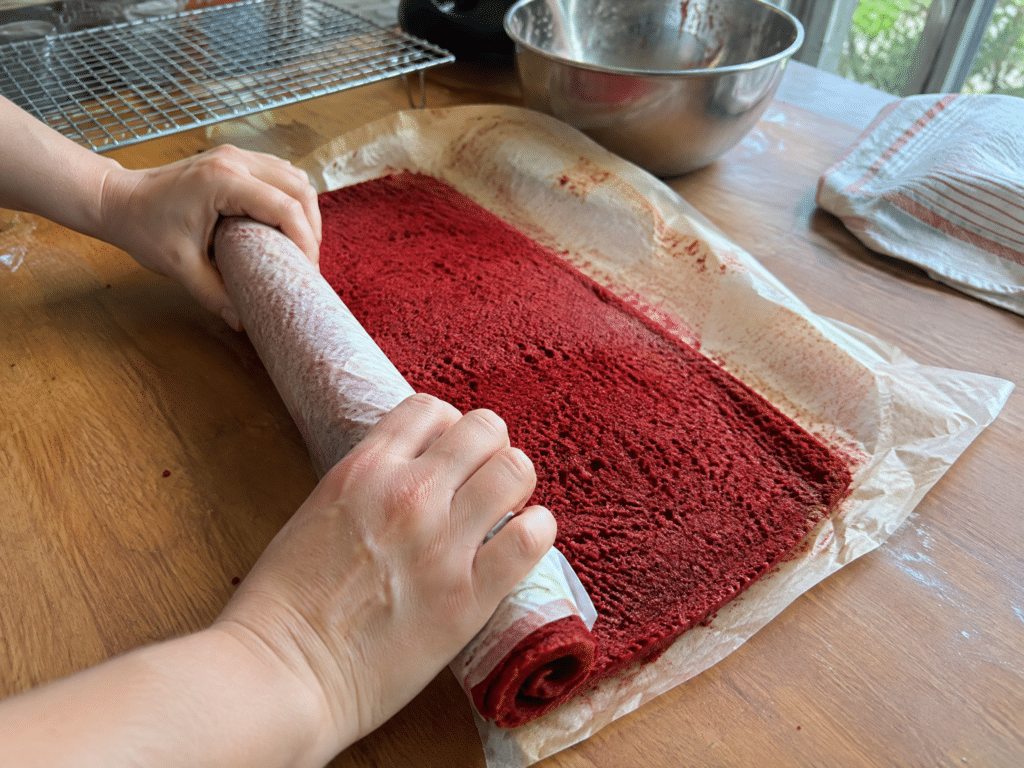
Step 3: Roll the Warm Cake Without a Towel
Here’s the moment everyone worries about. But you’ve got this!
Lift the baked cake from the pan using the parchment paper and place it on a wire rack. Let it rest for about 3 minutes to release excess steam.
Starting at one of the shorter sides, fold the parchment over the edge and gently roll the cake into a snug spiral.
Don’t wait until it’s completely cool. A warm sponge is more flexible and easier to shape.
Leave it rolled in the parchment paper until it cools completely.
Step 4: Make the Cream Cheese Filling
While your cake cools, let’s prepare that irresistible filling.
Beat the cold cream cheese and softened butter together until smooth. Add the powdered sugar and vanilla extract, then mix until creamy.
Give it a little taste. That tangy sweetness is exactly what makes a red velvet cake roll with cream cheese filling so special.
Refrigerate the frosting while the cake finishes cooling.
Step 5: Fill and Roll Your Red Velvet Cake
Carefully unroll the cooled sponge. If the surface feels particularly damp or sticky, leave it open for about 5 minutes.
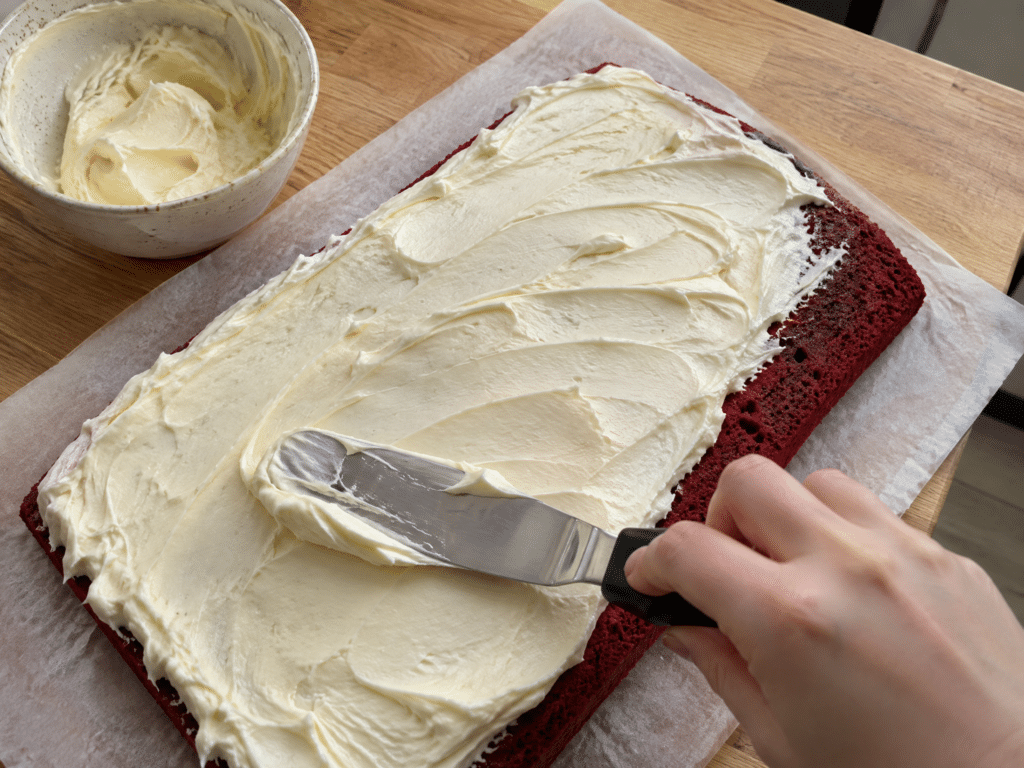
Spread the cream cheese filling evenly across the cake, leaving about ½ inch uncovered at the far edge.
Here’s a handy trick: keep your spatula touching the frosting rather than scraping against the sponge. This helps prevent red crumbs from mixing into your beautiful white filling.
Now gently roll everything back into a spiral, keeping it snug without pressing too hard.
Step 6: Chill, Slice, and Serve
Wrap your finished cake roll tightly in plastic wrap and refrigerate for 1 to 2 hours. This helps the cream cheese filling firm up and makes slicing much easier.
When you’re ready to serve, use a serrated knife and gently saw through the cake instead of pressing straight down.
For cleaner slices, wipe the blade between cuts. You’ll get approximately 12 servings.
Why Does My Red Velvet Cake Roll Crack When Rolling?
Usually, it’s because the cake cooled too much before the first roll, became overbaked, or was handled too roughly. The easiest way to reduce cracking is to roll the sponge while it’s still warm, keep the baking time under control, and use parchment paper to support the cake as you shape it.
Tips for a Moist Red Velvet Cake Roll
Can I tell you something? The first thing I’d worry about with a Red Velvet Cake Roll Recipe isn’t the frosting or even getting that gorgeous red color. It’s whether the cake will actually roll without cracking! And if you’re thinking the same thing, I completely understand. A cake roll can look perfect coming out of the oven, then suddenly split when you try to shape it. But here’s the good news: a few small adjustments can make the whole process much easier. You just need to pay attention to the baking time, moisture, and how you handle that delicate sponge.
How to Keep Your Red Velvet Cake Roll From Cracking
Here’s the trick I wouldn’t skip: roll the cake while it’s still warm. Give it about 3 minutes to release some steam, then gently roll it with the parchment paper.
Why so soon? Because warm cake is more flexible. Let it cool completely before that first roll, and you’re asking a delicate sponge to bend when it’s already set.
And don’t rush the baking either. Start checking around 13 minutes. The surface should spring back when you touch it lightly. If you leave it baking too long, those dry edges can crack more easily.
If you’re nervous about cracking the sponge, King Arthur Baking shares helpful tips on how to roll a cake without cracking.
How to Keep Your Red Velvet Cake Roll Moist
Nobody wants a beautiful cake that tastes dry, right?
For a moist red velvet cake roll, I’d pay special attention to the flour. Spoon it gently into your measuring cup and level it off instead of scooping directly from the bag. Too much flour can give you a heavier sponge than you want.
Also, once you add the dry ingredients, mix only until they’re incorporated. You’ve spent time whipping air into those eggs, so don’t lose it through unnecessary mixing.
And remember, a moist cake doesn’t mean an underbaked cake. You’re looking for something soft and tender that still holds its shape.
Parchment Paper vs. Kitchen Towel: Which Is Better?
Let’s be practical for a second. Do you really want red food coloring all over your favorite kitchen towel?
That’s why I like the parchment paper method for this recipe. It’s convenient, keeps cleanup simple, and helps support the cake as you roll.
But there’s a small downside. Parchment paper can trap steam, making the cake surface a little sticky.
My advice? Don’t panic or start peeling aggressively. Once the rolled cake has cooled, carefully open it and let the surface sit for about 5 minutes if it feels damp. Then add your cream cheese filling.
Why Is My Red Velvet Cake Roll Sticky After Cooling?
Usually, it’s trapped steam rather than a baking disaster.
If your cake feels slightly sticky after unrolling, give it a few minutes to release that extra moisture. Avoid scraping the surface because you could pull away pieces of the delicate sponge.
One last tip: when spreading the frosting, keep your spatula moving through the filling instead of dragging it directly against the cake.
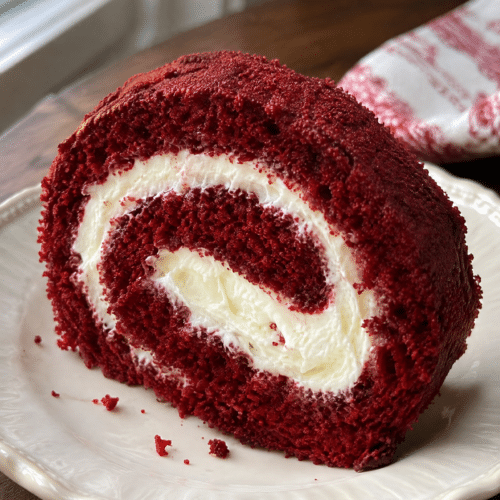
Remember, even if your first swirl isn’t perfectly round, that’s okay. Once you slice into that soft red sponge and creamy white filling, you’ll see why this dessert is worth making.
Red Velvet Cake Roll Variations and Substitutions
Here’s something I really like about this Red Velvet Cake Roll Recipe. Once you’ve mastered that beautiful swirl, you can have a little fun with it! Maybe you’re making it for Christmas and want something extra festive. Or perhaps you’re standing in your kitchen, halfway through gathering ingredients, when you realize you’ve run out of buttermilk. Sound familiar? Don’t worry, a few simple changes can help you make this dessert your own. That said, I’d keep the sponge recipe pretty close to the original, especially on your first attempt. The real fun starts with the filling and decorations.
Red Velvet Christmas Cake Decorating Ideas
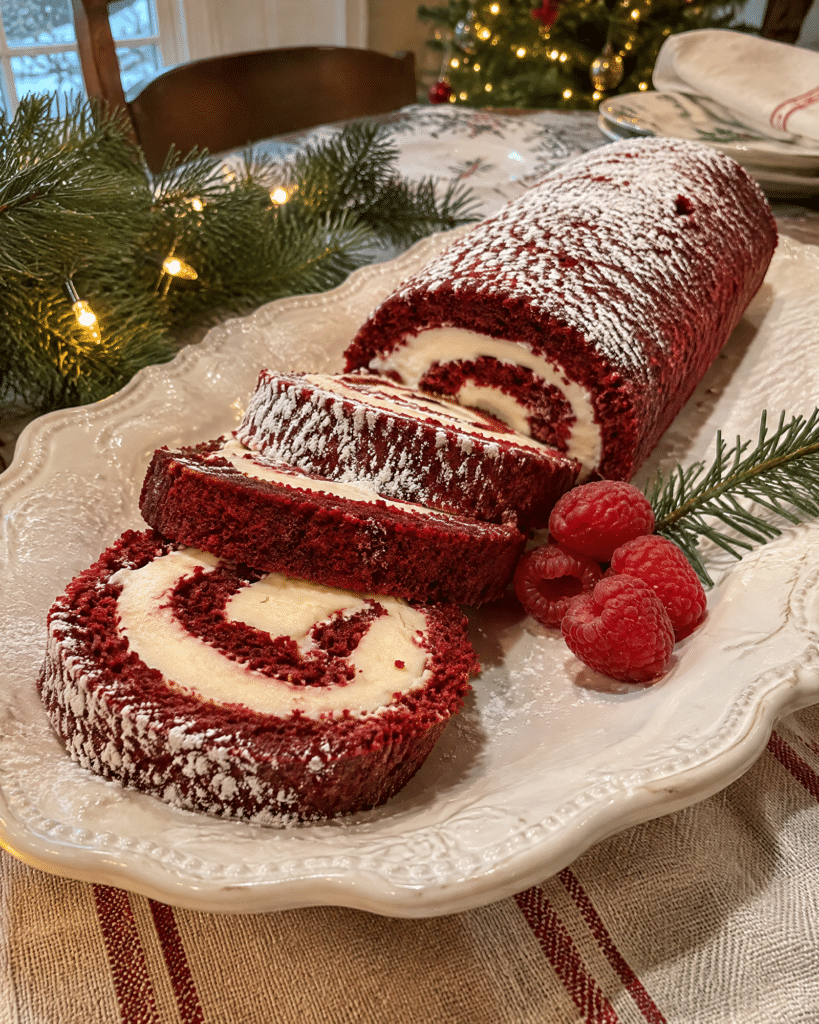
Have you ever noticed how red velvet desserts almost seem made for Christmas? That deep red sponge wrapped around creamy white frosting already looks festive before you add a single decoration.
If you’re planning a Red Velvet Christmas Cake, here are a few ways to dress up your cake roll:
- Powdered sugar: A light dusting gives the cake a beautiful snowy appearance.
- White chocolate drizzle: Perfect when you want a slightly sweeter finish.
- Fresh raspberries: Add a pop of color and a refreshing contrast to the cream cheese filling.
- Crushed peppermint candy: Sprinkle a little over the top just before serving for a festive touch.
My favorite approach? Keep it simple. A little powdered sugar and a few fresh berries can make the cake look lovely without hiding that gorgeous spiral.
Easy Red Velvet Cake Roll Filling Variations
Now, about that cream cheese filling. I wouldn’t change it too much because the slightly tangy flavor works so well with the sweet red velvet sponge.
But if you’re feeling adventurous, why not try something different?
A little finely grated orange zest could give the frosting a fresh, citrusy twist. Or, if you’re a chocolate lover, consider replacing the cream cheese filling with a thick, cooled chocolate ganache.
Just be careful with the consistency. A filling that’s too soft can escape when you roll the cake. And trust me, watching all that delicious frosting squeeze out isn’t the outcome we’re aiming for!
These are optional ideas rather than tested variations of the original recipe.
If you love the creamy, tangy filling in this red velvet cake roll, you should also try my Lemon Blueberry Cake With Cream Cheese Frosting. It’s another delicious homemade dessert that combines a soft, moist cake with rich cream cheese frosting.
Simple Ingredient Substitutions
We’ve all started baking only to discover that one ingredient is missing. Before heading to the store, check these alternatives:
- No buttermilk? Combine 2 tablespoons of milk with ½ teaspoon vinegar. Let it stand for 5 minutes before using.
- No vegetable oil? Canola oil is a good alternative because of its neutral flavor.
- Don’t want food coloring? You can leave it out, although your cake won’t have that signature bright red appearance.
- Out of vanilla extract? The cake will still bake without it, but you’ll miss some of that lovely background flavor.
One thing I wouldn’t experiment with casually is the flour. The sponge needs the right structure to roll successfully, so changing flour types may require additional recipe testing.
Can I Use This Recipe for Other Red Velvet Cake Ideas?
You can certainly use the flavors as inspiration! If you enjoy red velvet desserts, you might also love red velvet truffles, red velvet brownies, or a red velvet cheesecake cake.
But here’s my suggestion: master this cake roll first. Once you’re comfortable baking, filling, and rolling the sponge, you’ll have more confidence experimenting with different flavors and decorations.
And sometimes, the classic version really is the one everyone comes back for.
Red Velvet Cake Roll Recipe (Soft, Moist & Creamy)

Ingredients
- For the Red Velvet Cake
- – ¾ cup 90 g all-purpose flour
- – ¼ cup 20 g unsweetened cocoa powder
- – 1 teaspoon baking powder
- – ½ teaspoon salt
- – 4 large eggs
- – ¾ cup 150 g granulated sugar
- – 1 tablespoon vegetable oil
- – 2 tablespoons buttermilk
- – 1 teaspoon white distilled vinegar
- – 1 teaspoon vanilla extract
- – 2 tablespoons red food coloring optional
- For the Cream Cheese Filling
- – 8 oz 226 g cream cheese, cold
- – ½ cup 113 g butter, softened
- – 1 cup 120 g powdered sugar
- – 1 teaspoon vanilla extract
Instructions
- Preheat the oven: Set your oven to 350°F (175°C). Line a 15 x 10-inch jelly roll pan with parchment paper, leaving extra paper over the edges.
- Combine dry ingredients: Sift the flour, cocoa powder, baking powder, and salt into a bowl.
- Prepare the batter: Beat the eggs for 5 minutes until light and frothy. Gradually add the sugar and oil, then mix in the buttermilk, vinegar, vanilla, and food coloring.
- Add the flour mixture: Mix gently until just combined. Pour into the prepared pan and spread evenly.
- Bake: Bake for 13 to 15 minutes until the cake springs back when lightly touched.
- Roll the cake: Lift the cake onto a cooling rack using the parchment paper. Wait 3 minutes, then gently roll it from a short side while warm. Allow to cool completely.
- Prepare the filling: Beat the cold cream cheese and softened butter until smooth. Add powdered sugar and vanilla. Refrigerate until ready to use.
- Fill and re-roll: Carefully unroll the cake. Spread the cream cheese filling evenly, leaving a ½-inch border at the far edge. Roll the cake back into a spiral.
- Chill: Wrap tightly in plastic wrap and refrigerate for 1 to 2 hours.
- Serve: Slice using a serrated knife. Wipe the blade between cuts for cleaner slices.
Notes
- Prevent cracks: Roll the sponge while it’s still warm.
- Make ahead: Assemble the cake a day before serving and refrigerate.
- Storage: Keep covered in the refrigerator for up to 5 days.
- Freezing: Double wrap and freeze for up to 2 to 3 months.
- Buttermilk substitute: Mix 2 tablespoons milk with ½ teaspoon vinegar. Let stand for 5 minutes.
Red Velvet Cake Roll Nutrition Information
Wondering how many calories are in a slice of this Red Velvet Cake Roll Recipe? I get it! When a dessert has that much delicious cream cheese filling, it’s natural to be curious about what’s actually going into each serving. The good news is that you can enjoy a satisfying slice without needing an enormous portion. This recipe makes approximately 12 slices, which is just right for sharing with family or serving after a holiday dinner.
Estimated Nutrition Per Serving
Based on the listed ingredients, here’s a rough nutritional estimate for one slice when the cake is divided into 12 equal portions.
| Nutrient | Estimated Amount |
|---|---|
| Calories | 290 kcal |
| Carbohydrates | 31 g |
| Protein | 5 g |
| Total Fat | 17 g |
These are approximate calculations, not laboratory-tested nutritional values. The original recipe does not provide verified nutrition figures, and actual values depend on ingredient brands, substitutions, and slice size.
What Affects the Calories in Red Velvet Cake Roll?
Let’s talk about that irresistible cream cheese filling for a second. It’s one of the best parts of the dessert, but it’s also where a significant portion of the calories comes from. The butter, cream cheese, and powdered sugar create that rich, smooth texture we love.
And what about the cake itself? The flour, sugar, eggs, and cocoa powder contribute carbohydrates, protein, and fat.
If you’re looking for smaller portions, try cutting the roll into slightly thinner slices. Personally, I’d rather enjoy a smaller piece of the original recipe than change several ingredients and risk losing that lovely texture.
Is Red Velvet Cake Roll a Healthy Dessert?
Well, I’d think of it as a special treat rather than an everyday snack. It’s a rich dessert made with sugar, butter, and cream cheese, so moderation makes sense.
But here’s something worth remembering: enjoying homemade cake doesn’t have to be complicated. A slice served with fresh strawberries or raspberries can make a lovely dessert without adding more frosting or heavy toppings.
Does Red Velvet Cake Roll Contain Common Allergens?
Yes. This recipe contains wheat, eggs, and dairy from the flour, eggs, butter, and cream cheese.
If you’re baking for someone with food allergies, always check the ingredient labels carefully. Substituting allergy-friendly ingredients may also change how the sponge bakes and rolls, so it’s best to use a specifically tested alternative recipe when necessary.
Final Thoughts
If I could give you one piece of advice before making this cake, it would be this: don’t worry about getting that perfect swirl. I know how tempting it is to compare your homemade dessert to those beautiful bakery pictures. But trust me, the real excitement comes when you cut that first slice and see the soft red sponge wrapped around creamy, tangy filling.
And if your cake cracks a little? Honestly, who cares? A dusting of powdered sugar can work wonders, and the flavor is what everyone will remember anyway.
What I love about this Red Velvet Cake Roll Recipe is how something made with simple ingredients can feel so special. Whether it’s Christmas, a birthday, or just a weekend treat, it’s a dessert worth sharing.
So, give it a try! And when you do, tell me how it turned out. I’d love to hear about your baking experience!
Red Velvet Cake Roll Frequently Asked Questions
Making a Red Velvet Cake Roll Recipe for the first time can bring up quite a few questions. Will the cake crack? Can you prepare it the day before? And what happens if you have leftovers? Don’t worry, these are exactly the kinds of things worth knowing before you start baking. Let’s go through some common questions so you can enjoy the process without second-guessing every step.
1.Can You Freeze a Red Velvet Cake Roll With Cream Cheese Filling?
Yes, and it’s surprisingly convenient!
Once your cake is completely assembled, wrap it tightly in two layers of plastic wrap or use plastic wrap followed by aluminum foil.
You can freeze it for up to 2 to 3 months.
When you’re ready to serve, you can slice the cake while it’s still frozen and let individual slices thaw for approximately 20 minutes at room temperature. Alternatively, thaw the cake overnight in the refrigerator.
2.Can I Make a Red Velvet Cake Roll Without Buttermilk?
Yes! Don’t let an empty carton of buttermilk stop your baking plans.
Simply combine 2 tablespoons of regular milk with ½ teaspoon of vinegar and let the mixture sit for 5 minutes.
Use it in place of the buttermilk, keeping the additional teaspoon of vinegar already listed in the recipe.
It’s a handy substitution when you don’t feel like making another trip to the grocery store.
3.How Long Does a Red Velvet Cake Roll Stay Fresh?
Because this cake contains cream cheese filling, it needs to be refrigerated.
Keep your leftover slices in an airtight container or cover them tightly with plastic wrap. They’ll keep in the refrigerator for up to 5 days.
One little serving tip: use a sharp serrated knife and wipe it between cuts. You’ll get much cleaner slices without dragging cream cheese frosting through that beautiful red sponge.
And really, isn’t that gorgeous red-and-white swirl half the fun of making this dessert?